
Until my career in Sitecore, I haven’t got a chance to explore Personalization aspect of Sitecore. This is one of the key feature of Sitecore Experience Platform. If you are also in same boat as me, then this is the blog for you. Right personalization strategies will help businesses achieve not only deliver great results on the customer engagement but also drives growth in sales.
In this blog, we will be going to discuss Goals based Personalization. I have used Sitecore Habitat demo for this blog. If you are interested knowing about Sitecore Habitat you can read more about the same here. There is Git repository for the Sitecore Habitat, where you can download source code locally and will help you in getting started.
How to Create Goal
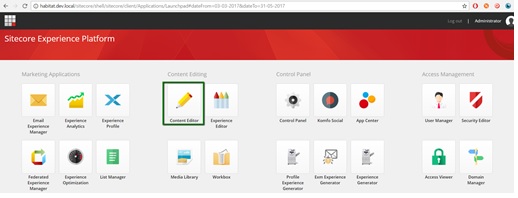
Login to the Sitecore and click on Content Editor
Go to Sitecore –> Systems –> Marketing Control Panel –> Goals
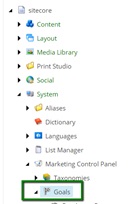
Right Click –> Insert and Select Goal

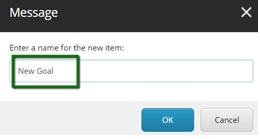
Message dialog will be displayed. Enter a name for goal and click on OK.
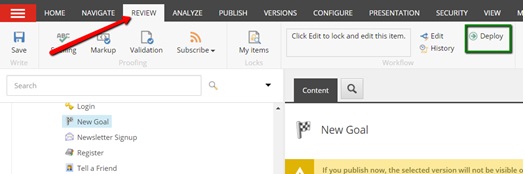
New Goal is created.

Go to Review ribbon and Click Deploy Goal. This is very important otherwise your goals will not be triggered in the live site.
That’s it! we have created a new goal.
Assign Goal to Content
Go to Content Editor and select any of the page item.
Click on Analyze ribbon and click on Goals. Goals Dialog will be displayed. Select the goal you have created.

Click Ok. Go to Publish Ribbon. Click Save and Publish the item.
Personalization
- Go to Sitecore Launchpad and Click on Experience Editor

2. Click on the Carousal component and click Personalize

Enable Personalization for the component and Click on the “+” sign
A new component will get added.

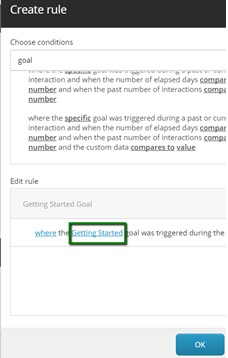
3. To configure personalization, provide appropriate name and rule when to personalize.


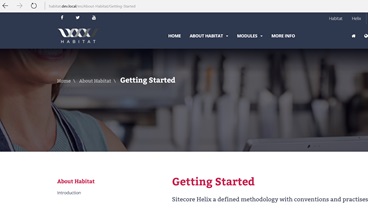
Select Dialog will be displayed,to select goal. ( “Getting Started” is already created in Habitat) you can select any goal as you wish.

we have configured rules to trigger personalization. Let’s now configure what component should be displayed once the Goal is triggered.
Click to browse available components, Select “Call to Action Header” component as shown below.
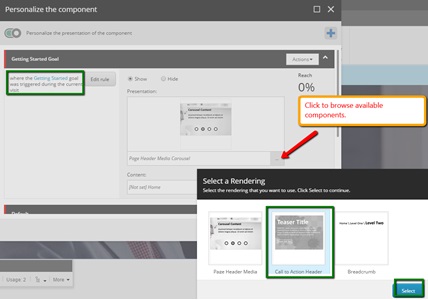
Now click to browse what content should be displayed in “Call to Action Header” component.

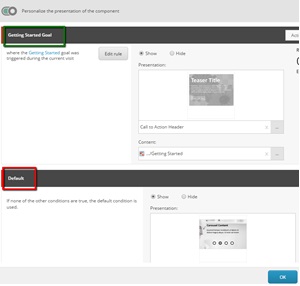
We have now completed, configuring Goal-based personalization. When “Getting Started” Goal is triggered it will replace the “Carousal” component with “Call to Action Header” component.
Click OK. Click on Save to save the changes and Publish the Item.

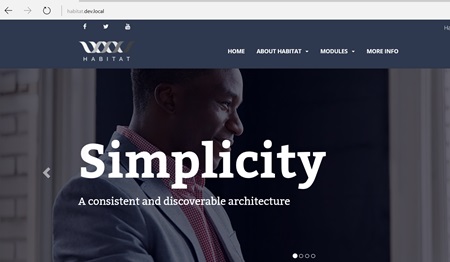
Open a New Browser and Go to Habitat Demo Site. See the home page. Default Carousal component will be displayed.
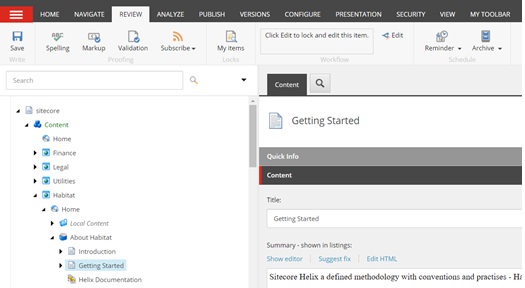
Now, Go to Getting Stated Page
Go Back to Home Page and you will see Carousal is replaced with Getting Started image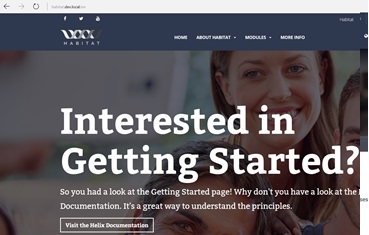 .
.
This is how we can show targeted content to the visitor using “Personalization”.
We will explore Campaigns in the next blog.

